Plasma monitors are an excellent choice for high-quality displays, often used in various settings from professional environments to home entertainment systems. However, achieving an optimal viewing experience often requires adjusting the monitor’s height. Here’s a detailed guide on how to adjust the height of your plasma monitor, including the necessary tools, step-by-step instructions, and essential tips.
Tools Required
- Screwdriver (Philips)
- Adjustable wrench
- Measuring tape
- Mounting bracket (if needed)
Step-by-Step Guide to Adjusting the Height
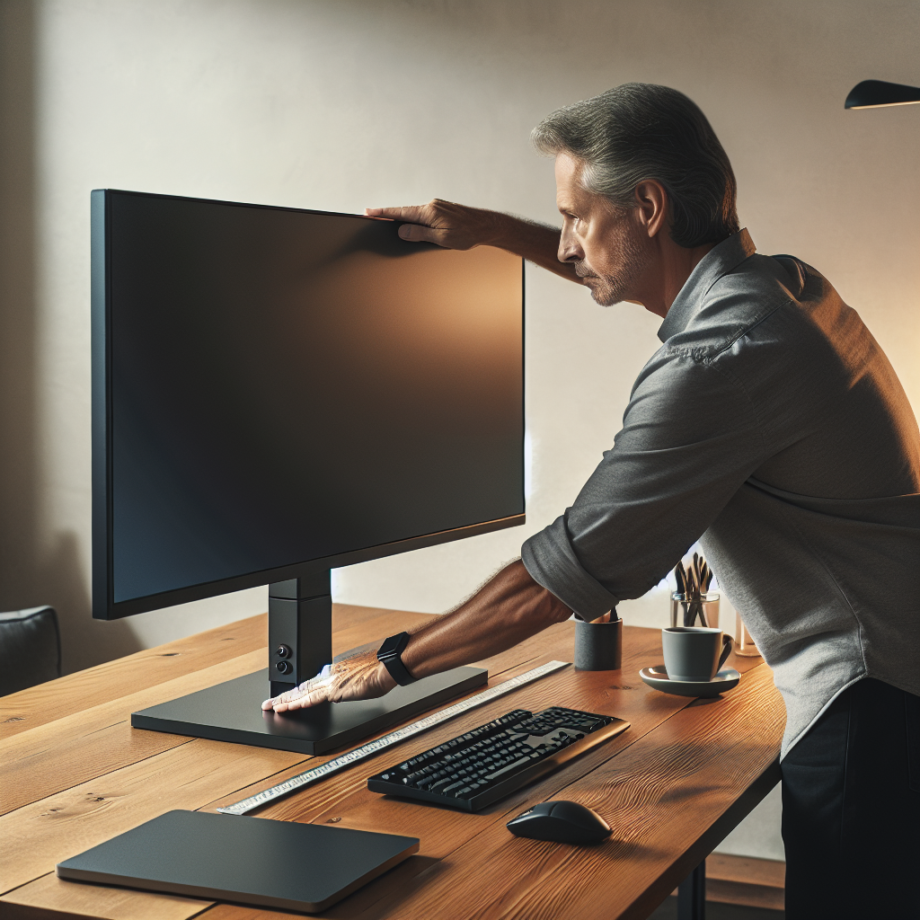
1. Determine the Optimal Height
The first step in adjusting the height of your plasma monitor is determining the ideal viewing height. This height generally aligns with your eye level when seated comfortably.
| Seating Position | Recommended Viewing Height |
|---|---|
| Seated on a Sofa | Approximately 42 inches from the floor to the center of the screen |
| Seated at a Desk | Approximately 24-30 inches from the desk surface to the center of the screen |
| Standing | Adjust according to individual height, typically around eye level |
2. Unplug and Prepare the Monitor
Before making any adjustments, make sure to unplug your plasma monitor from the power source. This ensures safety during the adjustment process.
3. Detach the Stand
Most plasma monitors come with a detachable stand. Use a screwdriver to remove the screws holding the stand to the monitor. Carefully store these screws, as you will need them later.
4. Adjust or Replace the Stand
Depending on your monitor model, you may either adjust the existing stand or replace it with a height-adjustable stand or mounting bracket. For adjustable stands, follow the manufacturer’s instructions to modify the height.
Adjusting an Existing Stand
- Loosen the height adjustment knob or screw.
- Slide the stand to the desired height.
- Tighten the knob or screw to secure the stand at the new height.
Replacing with a Mounting Bracket
- Select a bracket that is compatible with your plasma monitor.
- Install the bracket according to the manufacturer’s instructions.
- Attach the monitor to the bracket, ensuring it is securely fastened at the desired height.
5. Reattach the Monitor
Once the stand or bracket is adjusted to the correct height, carefully reattach the monitor using the previously removed screws. Ensure the monitor is stable and secure.
6. Reconnect and Test
Plug the monitor back into its power source and any connected devices. Test the monitor’s stability and viewing angle to confirm the height adjustment was successful.
Additional Tips
- Always consult your monitor’s user manual for specific instructions and safety warnings.
- If the monitor feels unstable after adjustment, double-check that all screws and fittings are securely fastened.
- Consider using a cable management system to keep cords organized and reduce clutter.
- If you frequently change your viewing angle or position, a height-adjustable stand or arm may offer greater flexibility and convenience.
In Conclusion
Adjusting the height of a plasma monitor can significantly enhance your viewing experience, providing better ergonomics and comfort. By following these steps and considering the recommended viewing heights, you can ensure your monitor is ideally positioned for your needs. Whether using an adjustable stand or a mounting bracket, a few simple adjustments can make a significant difference.